
Creative DIY Ideas for Personalized Wall Art
Personalized wall art turns a blank wall into a story about you—your colors, travels, interests, and memories. Whether you’re working with a rental wall, a tight budget, or a fully kitted-out studio, the ideas below will help you design, create, and display art that feels truly yours.
Planning Your Project
Before you pick up a brush or cut your first piece of paper, clarify a few basics. Good planning saves materials and gives you an outcome you’ll love.
Define the Purpose
- Focal point above a sofa or bed
- Cozy corner accent for a reading nook
- Gallery wall that grows over time
Choose a Style and Palette
Pick 1–2 key styles: modern minimal, cozy rustic, playful color, or botanicals. Limit your color palette to 3–5 hues for cohesion. Use a neutral (white, cream, gray, or black) to unify mixed pieces.
Scale and Proportion
- Above furniture: artwork width ≈ 2/3 the furniture width.
- Eye level: center of the art at about 57–60 inches (145–152 cm) from floor.
- Spacing: 2–3 inches (5–8 cm) between pieces in a gallery wall.
Mockups and Previews
- Painter’s tape outlines on the wall.
- Paper templates: tape kraft paper in the size of each piece.
- Phone mockup: photograph your wall and sketch shapes over it.
Essential Tools and Materials
- Cutting: craft knife, scissors, cutting mat
- Adhesives: PVA/white glue (acid-free for photos), glue stick, double-sided tape, spray adhesive (use with ventilation), mounting squares
- Paints and pens: acrylics, paint pens, watercolor set, permanent markers
- Surfaces: canvases, wood panels, heavy cardstock, watercolor paper, thrifted frames
- Hanging: picture hooks, Command-style strips, wire, level, tape measure
- Extras: washi tape, stencils, masking tape, spackle for patching small holes
Quick-Start Ideas (60 minutes or less)
- Washi Tape Mural: Create geometric lines or a city skyline using removable washi tape—great for rentals.
- Color-Block Paper Triptych: Cut colored cardstock into bold shapes, glue to white paper, and frame as a set of three.
- Instant Gallery Grid: Print nine 5x7 photos in black and white, pop them into identical frames, and hang in a tidy 3x3 grid.
- Botanical Prints: Use leaves as stamps with acrylic paint for elegant, organic patterns.
DIY Project Ideas (Step-by-step)
1) Modern Color-Block Canvas Triptych
Bold and minimal, this set creates a cohesive statement above a sofa or console.
Materials
- Three canvases (e.g., 12x16 or 16x20)
- Acrylic paints in 3–4 colors + white or cream
- Painter’s tape, foam brushes, level
Steps
- Sketch simple shapes: diagonals, semicircles, or arches that span all three canvases.
- Use painter’s tape to mask clean edges.
- Paint light colors first, let dry, then layer darker tones.
- Peel tape carefully; touch up with a small brush.
- Arrange canvases so shapes align across the trio.
Tip: Repeat one color in each panel to unify the set.
2) Stenciled Typography Board
Turn favorite words, dates, or coordinates into crisp wall art.
Materials
- Wood board or canvas, sandpaper (if wood)
- Letter stencils or vinyl letters
- Acrylic paint or spray paint
Steps
- Prime the surface for even color.
- Arrange stencils; tape edges to prevent shifting.
- Apply paint with a dry brush or light spray passes to avoid bleed.
- Remove stencils while paint is slightly tacky.
Variation: Use metallic paint on a matte background for contrast.
3) Pressed Leaf Botanical Prints
Nature-inspired prints with real leaves add calm and texture.
Materials
- Flat leaves or fern fronds
- Heavy paper or watercolor paper
- Books for pressing, PVA glue (acid-free)
- Frames with mats
Steps
- Press leaves between parchment inside heavy books for 3–7 days.
- Arrange on paper; lightly glue stems and key points.
- Place under a clean book to dry flat.
- Frame with a mat for a museum-style finish.
Tip: Label the bottom corner with species and date for a botanical print vibe.
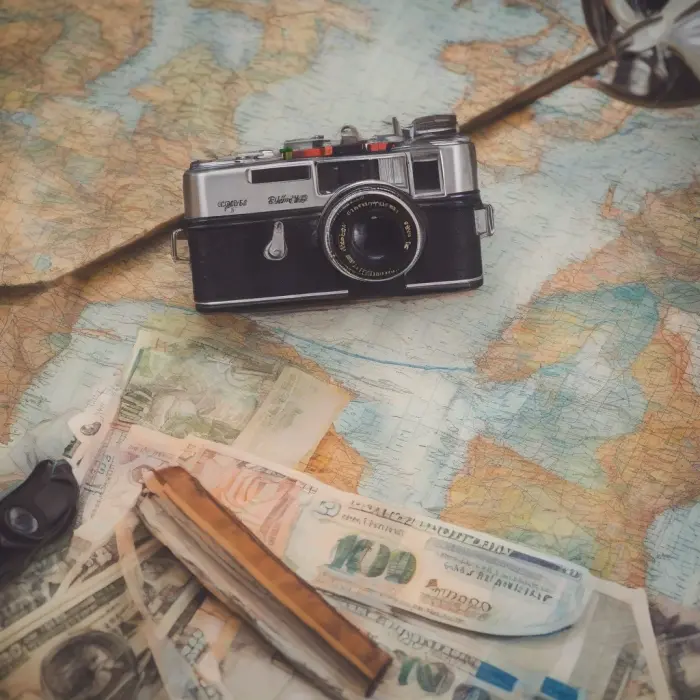
4) Travel Map of Memories
Mark places that matter—hometowns, adventures, or dream trips.
Materials
- Map print or vintage atlas page
- Pins or adhesive dots, thread (for connecting lines)
- Shadow box frame (optional)
Steps
- Mount the map to foam board or cardboard backing.
- Add pins or dots at meaningful locations.
- Use thread to connect routes; tape thread on the back.
Variation: Print a monochrome map and add color-coded locations (e.g., blue for lived, red for visited).
5) Soundwave Art from a Voice Memo
Transform a short message (“I love you,” a child’s laugh) into graphic art.
Materials
- Phone or computer to record and screenshot waveform
- Photo editor or vector app (optional)
- High-quality paper or canvas print
Steps
- Record a phrase and screenshot the waveform.
- Increase contrast and crop to a clean bar shape.
- Print on thick paper, or trace onto canvas with transfer paper and paint in.
Tip: Add a caption with the date or the words spoken in small text below.
6) Washi Tape Geometric Mural (Renter-Friendly)
Create a mural without paint—fully removable and customizable.
Materials
- Washi tapes in 3–5 colors/widths
- Level and pencil
Steps
- Sketch a simple pattern: diamonds, stripes, or angles radiating from a corner.
- Use a level to place key lines straight; fill in with accent lines.
- Trim ends with a craft knife for neat corners.
7) String Art Monogram
Graphic and tactile—great for entryways or kid rooms.
Materials
- Wood board, nails or tacks, hammer
- Embroidery thread or yarn
- Paper template of a letter
Steps
- Tape the letter template onto the board.
- Hammer nails around the outline 0.5–1 inch apart, remove paper.
- Tie thread to one nail, weave across randomly until the letter fills.
8) Photo Grid with Uniform Frames
Clean, gallery-style display with minimal fuss.
Materials
- 9–12 identical frames
- Printed photos (all color or all black and white)
- Level, measuring tape
Steps
- Lay frames on the floor to finalize order.
- Mark a vertical centerline on the wall; hang outward from center.
- Keep spacing consistent (2–3 inches).
9) Fabric Swatch Gallery
Showcase meaningful textiles: vintage scarves, upholstery samples, baby clothes.
Materials
- Fabric swatches, iron
- Foam board or canvas
- Staple gun or fabric glue
Steps
- Press fabric smooth.
- Wrap around backing, secure with staples or glue on the back.
- Frame or hang directly with sawtooth hangers.
10) Shadow Box Curiosity Cabinet
Turn small keepsakes into a dimensional story.
Materials
- Shadow box frame
- Objects: ticket stubs, shells, keys, patches
- Pins, thread, or glue dots
Steps
- Arrange items in clusters by theme or color.
- Secure gently; avoid permanent adhesives on irreplaceables.
- Add a small label or date for each cluster.
11) Negative Space Silhouette
Create a striking portrait or object silhouette using the background as the “subject.”
Materials
- Photo printout or outline
- Heavy paper or canvas
- Masking film or paper, acrylic paint
Steps
- Cut the silhouette out of masking paper and place on canvas.
- Paint the background; remove mask to reveal the crisp silhouette.
- Outline with a paint pen for definition (optional).
12) Modern Paper Quilling Shapes
Sculptural paper coils arranged into minimalist forms or initials.
Materials
- Quilling strips or cut paper strips
- Quilling tool or toothpick, PVA glue
- Thick backing paper
Steps
- Roll coils and shapes (teardrops, marquise).
- Arrange into letters or abstract clusters.
- Glue lightly, then press under a book to flatten base.
Layout, Hanging, and Display Tips
Popular Arrangements
- Linear: Three or four pieces aligned along a centerline.
- Grid: Even rows and columns; best with matching frames.
- Salon: Eclectic mix anchored by a central piece.
- Triptych: Three panels forming one composition.
Hanging Hardware
- Renter-friendly: Command-style strips, thin nails in stud locations.
- Use bumpers on frame corners to prevent wall scuffs.
- Check for hidden wires/pipes before drilling; use a stud finder where possible.
Lighting
- Indirect light reduces glare for glass frames.
- Picture lights or adjustable track heads add gallery drama.
- Avoid direct sun on photos and textiles to reduce fading.
Sustainability, Safety, and Care
Eco-Friendly Choices
- Upcycle frames, canvases, and wood offcuts.
- Choose water-based paints and low-VOC adhesives.
- Use archival, acid-free materials for photos and textiles.
Safety Notes
- Ventilate when using spray adhesives or sealers.
- Cut away from your body; use a sharp blade on a cutting mat.
- Wear a dust mask when sanding wood; secure workpieces before drilling.
Maintenance
- Dust frames and canvases with a soft, dry cloth.
- Spot clean glass with a damp microfiber cloth; avoid streaks.
- Periodically rotate pieces in sunlit areas to minimize uneven fading.
Troubleshooting and FAQs
My paint bled under the tape. How do I fix it?
Seal edges by painting the background color over the tape first, then apply the new color. Touch up with a fine brush after removing tape.
Frames look uneven even though I measured.
Walls and frames can be slightly off. Hang by aligning the top edges with a level and adjust hanging hardware on the frame backs if needed.
How do I make a cohesive gallery with mixed art?
Use consistent mats or frame colors, repeat one accent color throughout, and maintain consistent spacing.
What’s a renter-safe way to create big impact?
Washi tape murals, fabric tapestries on lightweight rods, and large paper prints in poster rails hung with adhesive strips.
Simple SVG Stencil Templates (Optional)
Print and cut these basic shapes to use as stencils.