


Creative Ways to Upcycle and Reduce Household Waste
Upcycling turns everyday discards into durable, useful, or beautiful items—diverting waste from landfills while stretching your budget and creativity. This guide shares practical, safe, and achievable ways to upcycle across your home, along with habits that make low-waste living stick.
Why Upcycle (and How It Differs from Recycling)
Recycling breaks materials down to make new ones; it’s helpful but energy-intensive and limited by market demand and contamination. Upcycling keeps items at their highest value for longer by repairing, refashioning, or reusing them in new ways. The result: less extraction of raw materials, fewer greenhouse gases, and unique items with a story.
- Reduce: The cleanest waste is the waste you never create.
- Reuse: Give items a second job before discarding.
- Repair: A simple fix often outlives a brand-new replacement.
- Recycle/Compost: Use as a last step when reuse isn’t possible.
Core Principles and Safety
- Start with what you have. Build ideas around your actual discards.
- Design for disassembly. Use screws or ties so parts are easy to repair or recycle later.
- Choose durable finishes. Natural oils, water-based sealers, and quality fasteners extend life.
- Think modular. Make pieces that adapt as needs change.
- Safety first:
- Ventilate when sanding, stripping, or painting. Wear eye and dust protection.
- Assume old paint may contain lead; test or keep coatings intact if uncertain.
- For pallets, look for “HT” (heat-treated) stamps; avoid “MB” (methyl bromide).
- Don’t cut pressurized containers; fully depressurize and follow local guidance.
- Be cautious with electronics and lithium batteries—avoid puncturing; recycle at e‑waste facilities if unsure.
Room-by-Room Upcycling Ideas
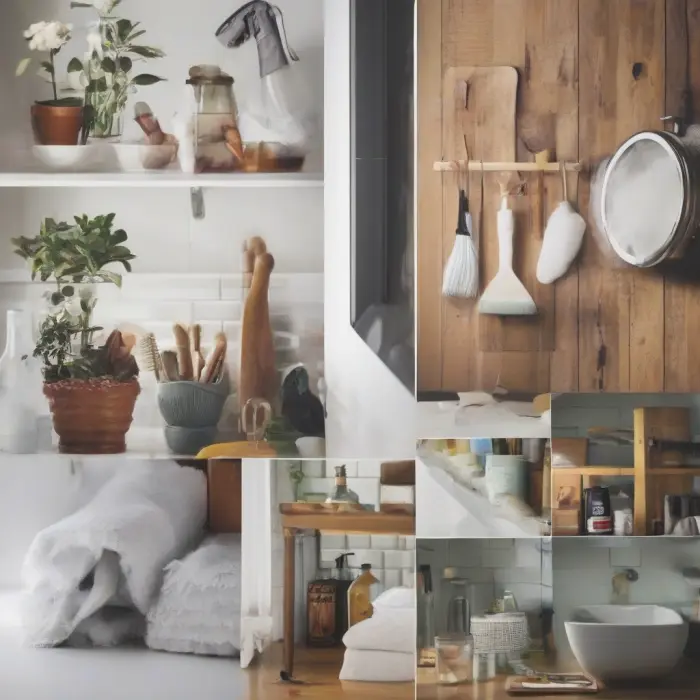
Kitchen
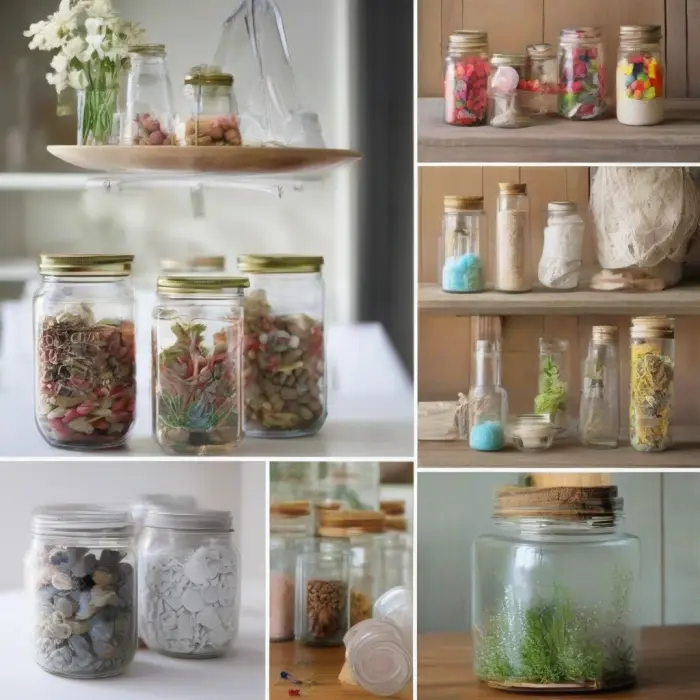
- Glass jars become pantry canisters, spice containers, or herb planters. Add labels and reuse lids.
- Worn cutting boards turn into serving trays or cookbook stands with a small ledge.
- Wine corks form trivets or a bulletin board when glued to a backing.
- Tea tins or coffee cans make utensil crocks or compost caddies (line with paper).
Bathroom
- Candle jars store cotton rounds, hair ties, or bath salts. Remove wax by freezing and scraping.
- Old towels cut into reusable cleaning cloths or washable mop pads.
- Small glass bottles refilled with homemade foaming soap or shampoo.
Bedroom and Closet
- Stained T‑shirts become braided rugs or knit into yarn for baskets.
- Single socks serve as dusting mitts or shoe buffers.
- Old drawers mount as floating shelves or nightstands.
Living Room
- Shipping boxes form cable organizers: thread cables through labeled holes.
- Damaged books become photo frames or secret storage by hollowing a section.
- Fabric remnants create cushion covers and slipcovers to refresh worn furniture.
Home Office
- Toilet paper rolls corral cables; wrap with leftover wallpaper or paper scraps.
- Jars and tins as pen cups; magnetic strip inside lid to catch paper clips.
- Monitor riser from stacked hardcover books tied with a strap or from scrap wood.
Kids’ Areas
- Cardboard transforms into play kitchens, castles, or marble runs.
- Broken crayons melt into new multicolor crayons in silicone molds (adult supervision).
- Egg cartons store art supplies or become paint palettes.
Outdoors and Garden
- Food-grade buckets become planters with drainage holes; add a wick for self-watering.
- Old ladders turn into vertical gardens or trellises.
- Broken terracotta pots make plant markers; shards aid drainage in large planters.
Garage and Entryway
- Pallet slats or scrap wood become shoe racks or wall-mounted hooks (sand edges).
- Glass jars with screw-top lids mount under shelves for storing nails and screws.
- Bicycle inner tubes cut into strong rubber bands or jar grippers.
Holidays and Gifting
- Maps, sheet music, and brown paper bags make gift wrap; finish with twine or fabric strips.
- Fabric scraps or old clothes become reusable gift bags and ribbons.
- Wine bottles as table lamps with string lights; corks as place card holders.
Ideas by Material
Glass
- Jars as fermenting vessels with airlocks or as pantry storage with gasketed lids.
- Bottles as watering globes for plants; insert neck-down after filling.
Metal
- Food cans as lanterns: punch holes in patterns; add a wire handle. Deburr edges.
- Bent cutlery as hooks or handles for cabinets and boards.
Textiles
- Denim becomes sturdy aprons, potholders, or device sleeves (layer for padding).
- Bedsheets into curtains, tote bags, or bulk-bin produce sacks.
Plastics
- HDPE jugs sliced into drawer dividers, garden trowels, or scoops.
- Sturdy containers refilled for cleaning concentrates or bulk goods.
Paper and Cardboard
- Corrugated inserts as seed-starting cells; plant directly if uncoated.
- Shredded paper for pet bedding or compost (balance with greens).
Wood
- Offcuts into coasters, trivets, or charging stations; route edges for a finished look.
- Crates as modular shelves or under-bed storage on casters.
Electronics
- Old routers as network extenders (if supported) after resetting firmware.
- Laptop hard drives repurposed as external storage with a SATA-to-USB enclosure.
- When unsure, take to an e‑waste recycler—don’t risk damage or exposure to hazardous materials.
Beginner-Friendly DIY Projects (Step-by-Step)
1) No-Sew T‑Shirt Tote Bag
Materials: old T‑shirt, scissors, ruler, chalk.
- Turn shirt inside out. Cut off sleeves and a deeper U at the neck for the bag opening.
- Mark a 6–8 inch band along the bottom. Cut 1-inch-wide fringe through both layers.
- Tie opposing fringe pieces together in double knots. Turn right-side out. Done.
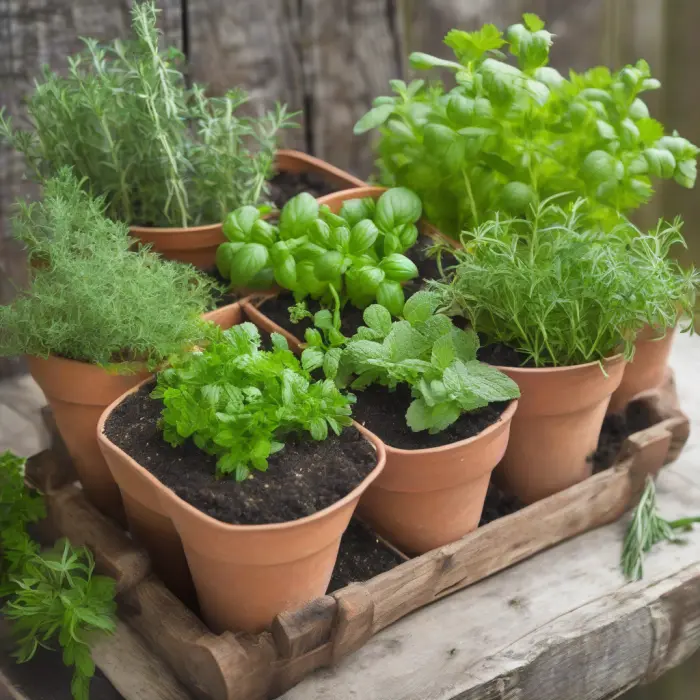
2) Jar Herb Garden
Materials: clean glass jars, pebbles, activated charcoal (optional), potting soil, herb starts, labels.
- Add a layer of pebbles and a sprinkle of charcoal to each jar for drainage and odor control.
- Fill with soil, plant herbs, and label. Place near bright, indirect light and water lightly.
3) Scrap-Wood Charging Station
Materials: small board, drill with spade bit, sandpaper, finish (oil or water-based), cable clips.
- Drill a row of holes for device stands; add a larger channel on the back for cables.
- Sand smooth, apply finish, and route cables underneath with clips or zip ties.
4) Cork Trivet
Materials: wine corks, strong glue, cutting mat, sharp knife, backing (thin plywood or cork sheet).
- Slice corks lengthwise for a flat surface. Arrange tightly on backing in a hex or brick pattern.
- Glue in place, press under weight while curing, and trim edges if needed.
5) Upcycled Lantern from a Food Can
Materials: empty can, water, freezer, nail/awl, hammer, wire, tea light or LED.
- Fill can with water and freeze to support the metal while punching holes.
- Mark a pattern, tap holes with the nail, thaw, dry, deburr, add wire handle, and light safely.
Habits That Shrink Waste
- Run a two-week waste audit. Note what fills your bin most and target those items first.
- Build a “reuse station” at home: jars, boxes, scrap fabric, tools, adhesives, and labels.
- Shop package-light: buy in bulk where possible and bring containers to refill stations.
- Choose repairable designs. Prefer items with replaceable batteries and standard screws.
- Compost food scraps (or join a community compost). Freeze scraps for broth before composting.
- Plan your “exit strategy.” Before buying, decide how you’ll maintain, repair, and eventually pass on or recycle the item.
30-Day Upcycling Challenge (Quick Wins)
- Day 1–5: Label and organize jars; convert 5 plastic containers to drawer dividers.
- Day 6–10: Make 10 cleaning cloths from old towels; set up a compost caddy.
- Day 11–15: Upcycle 1 shirt to tote; fix 1 garment; repair 1 wobbly chair or hinge.
- Day 16–20: Create a cable organizer; repurpose 2 boxes for closet storage.
- Day 21–25: Start a herb jar; make a cork trivet; swap items with a neighbor.
- Day 26–30: Audit progress; list 5 items to avoid buying new next month.
Community and Circular Sharing
- Join local swap groups or a Buy Nothing community to borrow and give.
- Visit repair cafés or maker spaces to learn skills and access tools.
- Donate wisely: ensure items are clean, functional, and season-appropriate.
- Offer parts: lids, buttons, fabric scraps, boxes—crafters and teachers may want them.
Design Tips to Make Upcycles Look Great
- Unify with color: choose a small palette and repeat it across items.
- Mix textures: glass with wood, metal with soft textiles, matte with gloss.
- Hide utility: route cables, add felt pads, countersink screws, and use edge banding or trim.
- Finish thoughtfully: sand to 220 grit; seal with food-safe oil where appropriate.
- Label elegantly: use paint pens, embossed tape, or printable labels for a cohesive look.
Kid-Friendly and Educational Ideas
- STEM builds: rubber-band cars from cartons; balloon rockets with straws and string.
- Art from scraps: collage from magazines, cardboard sculptures, nature mobiles.
- Sorting game: practice recycling categories with a color-coded bin station.
- Impact journal: kids track items they saved from the bin and sketch their creations.
How to Measure Your Impact
- Track weight or volume: weigh your trash and recycling weekly and note changes.
- Count avoided purchases: log items you didn’t buy because you repurposed or repaired.
- Set targets: for example, reduce landfill bin pickups by 25% in 3 months.
- Celebrate milestones: share before-and-after photos to inspire others.
Tip: Keep a simple notebook or a note on your phone with three columns: Item upcycled, date, and “what I avoided buying.” Review monthly.
Common Myths and How to Avoid Pitfalls
- Myth: Upcycling is messy or “makeshift.” Reality: With good prep and finishes, upcycles can look high-end and last.
- Myth: It takes too much time. Reality: Focus on quick wins (under 30 minutes) and batch projects.
- Myth: Everything should be saved. Reality: Keep only what you’ll realistically use within a set timeframe; recycle or donate the rest.
- Pitfall: Using unsafe materials (treated pallets, chipped lead paint, cracked containers for food). Solution: Learn stamps/labels; test or avoid questionable items.