Why Build a Magnetic Spice Rack?
Tired of rummaging through crowded cabinets or spice drawers? A magnetic spice rack is a sleek, space-saving solution that keeps your favorite flavors visible, accessible, and beautifully displayed. Whether you mount it on the fridge, under a cabinet, or on a wall-mounted steel board, this project is approachable, customizable, and renter-friendly with the right hardware.
Choose Your Build Style
Pick the approach that suits your space, budget, and aesthetic. All three can produce a clean, modern look.
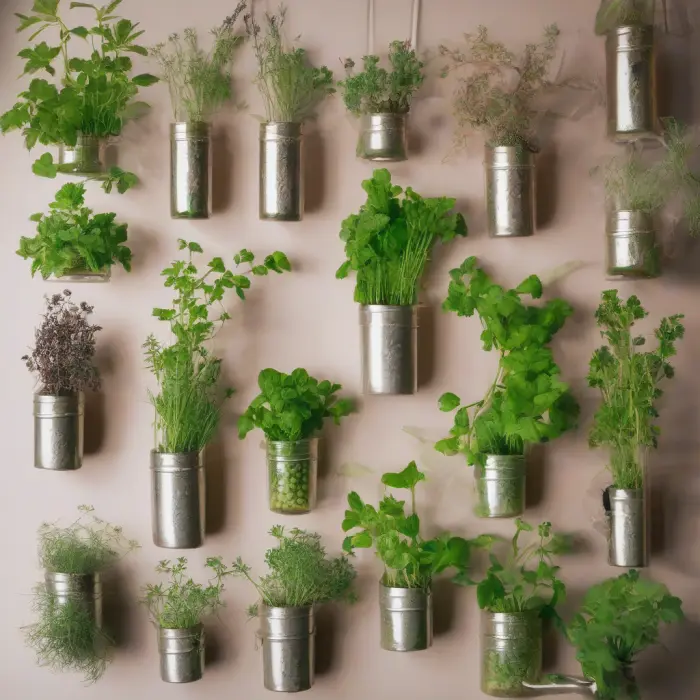
- Magnetic Tins + Metal Surface: Buy ready-made magnetic spice tins and stick them to your fridge door or a mounted steel sheet. Fastest option.
- Jars with Magnetic Lids + Metal Surface: Use small glass jars and attach magnets to their lids so they cling to a steel sheet or fridge.
- Under-Cabinet Steel Strip: Mount a slim steel strip beneath a cabinet and attach magnetized lids; jars hang downward and free up the backsplash.
Materials and Tools
Materials
- Magnetic spice tins or small jars (2–6 oz). Consider hex or round shapes for tight packing.
- Neodymium magnets (N42–N52, nickel-plated). Discs or rings, 12–20 mm diameter, 2–3 mm thick.
- Steel surface: refrigerator, or cold-rolled steel sheet (e.g., 16–20 gauge), or steel bar/strip for under-cabinet.
- Adhesive: 2-part epoxy (strongest), E6000, or gel cyanoacrylate (CA). Epoxy preferred for metal-to-metal.
- Labels: label maker tape, vinyl stickers, chalk labels, or paint pen.
- Fasteners for mounting (if using a steel sheet): wall anchors, wood screws, washers.
- Optional: clear food-safe inner liners, desiccant packs, silicone rings for better seals.
Tools
- Measuring tape, ruler, and pencil.
- Sandpaper (220–400 grit) for light scuffing before glue.
- Drill/driver and bits (for wall mounting).
- Level and stud finder.
- Clamps or heavy weights (to hold magnets during curing).
- Rags and isopropyl alcohol for surface prep.
- Optional: tin snips (if cutting your own steel sheet), edge trim to cover sharp edges.
Tip: Not all stainless steel is magnetic. For a wall panel, choose plain carbon steel or a magnetic grade like 430 stainless. Many refrigerators are magnetic on the sides, sometimes less so on the front.
Step-by-Step Instructions
Option A: Fastest Build — Ready-Made Magnetic Tins
- Plan layout: Decide where to place the tins (fridge door, side, or a steel board). Check door swing clearance and kid/pet reach.
- Clean the surface: Wipe with isopropyl alcohol to remove oil and dust for maximum grip.
- Test hold strength: Fill one tin with spice and place it. Open/close the fridge and watch for sliding. If it slips, reduce fill weight or move to a more vertical-friendly spot.
- Label: Apply labels to lids or clear windows. Consider adding a “packed on” date.
- Arrange: Alphabetical, by cuisine, or by frequency of use. Keep heat-sensitive spices away from the oven side.
Option B: Jars + Magnetized Lids
- Select jars: Small glass jars with flat metal lids work best. Test a magnet on the lid—if it sticks, you can glue a magnet inside or outside.
- Prep lids: Lightly scuff the glue area with sandpaper; wipe clean with alcohol.
- Glue magnets: Mix epoxy and apply a thin even layer. Press the magnet onto the center of each lid. Clamp or weigh down. Allow full cure per instructions (often 12–24 hours).
- Test pull: After curing, attach an empty jar and then a filled jar to your steel surface. Verify it holds during door movement or vibration.
- Fill and label: Add spices, label lids/sides, and arrange.
Option C: Under-Cabinet Magnetic Strip
- Measure cabinet bottom: Choose a steel bar or a narrow steel plate that fits the width of your cabinet.
- Pre-drill and mount: Locate cabinet support rails; pre-drill and attach with wood screws and washers. Use a level.
- Magnetize lids: As in Option B. Jars will hang downward—test with a fully loaded jar for safety.
- Safety check: Ensure jars clear your backsplash and won’t obstruct cooking or cleaning.
Magnet Strength: Get It Right
Pick magnets with enough pull to hold a filled jar against vertical surfaces and vibrations.
- Recommended starting point: One neodymium disc magnet 12–20 mm diameter, 2–3 mm thick, N42–N52 grade, per small jar. For heavier jars, use two magnets or a larger disc.
- Pull force vs reality: Manufacturer pull ratings assume ideal conditions. Expect 40–60% of rated hold on painted or slightly curved surfaces like a fridge door.
- Friction matters: A rubberized pad between magnet and metal increases friction and reduces sliding. You can add a very thin silicone dot to the magnet face.
- Test filled weight: Typical 4 oz (120 ml) jar with spice weighs ~150–250 g. Aim for 1–2 kg rated pull for vertical mounting for a safety margin.
Mounting a Steel Board (If Not Using the Fridge)
- Choose size: 12×18 in or 18×24 in steel sheet suits most kitchens. Add a picture frame or U-channel trim to cover edges.
- Find studs: Use a stud finder. If studs aren’t available where you want it, use appropriate drywall anchors (toggle bolts for heavier boards).
- Mark and drill: Pre-drill holes in the steel sheet (use cutting oil and a cobalt bit). Deburr edges; add grommets or washers to protect the wall.
- Mount: Level the board, drive screws into studs/anchors, and check for wobble.
Renter-friendly alternative: Use removable heavy-duty picture hanging strips on a lightweight steel board. Confirm weight limits and test gradually.
Labeling and Organization Ideas
- Alphabetical: Quick to find any spice.
- By cuisine: Group curries, Italian herbs, baking spices, BBQ rubs.
- By use frequency: Keep daily staples at eye level or closest to your prep zone.
- Color-coding: Use label colors or cap rings to designate categories.
- Dates: Add “opened” or “refilled” dates; most ground spices peak within 6–12 months.
Care, Food Safety, and Longevity
- Keep away from heat and light: Mount away from direct sunlight and oven heat to preserve flavor.
- Moisture control: Avoid shaking jars over steamy pots; add a tiny food-safe desiccant packet if humidity is high.
- Cleaning: Wipe magnets and surface with a damp cloth. Dry immediately to prevent corrosion.
- Corrosion resistance: Nickel-plated neodymium magnets can rust if the plating chips. Handle gently and consider sealing with a thin epoxy coat.
- Food contact: Keep magnets and adhesive outside the food path. If using liners or seals, ensure they are food-safe.
Customization Ideas
- Windowed tins: Choose tins with clear lids to spot contents instantly.
- Hex jars: They tessellate neatly with minimal gaps. li>
- Chalkboard paint: Paint the steel board and write categories with a chalk marker.
- Tiered zones: Add slim rails or frames on the steel board to define sections for different cuisines.
- Magnetic scoops: Stick a tiny stainless scoop to the board for neat measuring.
Troubleshooting
- Jars slide down: Increase friction (silicone dots), use stronger magnets or add a second magnet, lighten jar fill, or switch to a vertical steel board with a slight lip.
- Magnets pop off lids: Improve surface prep (sand and degrease), use fresh 2-part epoxy, clamp during cure, and avoid shearing the bond until fully cured.
- Board warps or rattles: Use thicker steel (lower gauge), add spacers at corners, or secure more mounting points.
- Fridge door flexes: Try the fridge’s side panel or a separate mounted steel board; heavy jars on a door can stress thin skins.
- Stainless jars not sticking: Some stainless (304/316) is non-magnetic. Use magnetized lids or switch to carbon steel lids/tins.
Budget and Sustainability Tips
- Repurpose baby food jars or small condiment jars; match lids for a consistent look.
- Buy magnets in bulk packs to reduce cost per piece.
- Purchase spices from bulk bins and refill to reduce packaging waste.
- Use offcuts from a metal shop for a cheaper steel plate; sand and clear-coat for a clean finish.
Visual Layout Example
FAQs
Will magnets affect the flavor or safety of my spices?
No. Permanent magnets do not alter flavor, aroma, or safety of dry spices.
How many magnets per jar?
One strong disc magnet is often enough for small jars. For heavier jars or slick surfaces, use two smaller discs spaced apart for better stability.
Can I mount this inside a cabinet door?
Yes, but verify hinge capacity and clearance. Use lightweight tins and secure the metal plate well to avoid door sag.
What if my fridge isn’t magnetic?
Mount a steel sheet to the wall or the side of a cabinet instead. Use proper anchors for the combined weight of board and jars.
How many jars can I safely place?
Calculate the board’s capacity: total jar weight (including spices) must be well under the anchor and board limits. As a rule of thumb, plan for 0.3–0.5 kg (0.7–1.1 lb) per anchor point in drywall with proper toggles, higher if into studs.
Are there pacemaker concerns?
Avoid placing strong magnets near medical devices. If anyone in your home has an implanted device, consult device guidelines and keep magnets at a safe distance.
Quick Build Checklist
- Pick your surface (fridge, steel board, or under-cabinet strip).
- Choose jars/tins and acquire magnets.
- Prep surfaces (scuff and degrease) and glue magnets to lids.
- Mount steel securely if needed.
- Fill, label, arrange, and test for slips.
- Make adjustments: add friction pads, stronger magnets, or reposition.


