Innovative DIY Ideas for Upcycling Glass Bottles

Innovative DIY Ideas for Upcycling Glass Bottles

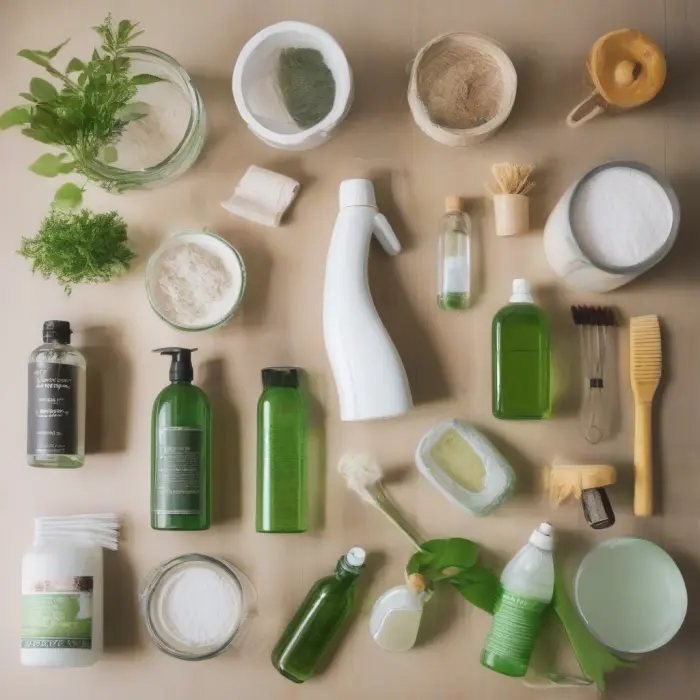
Glass bottles are more than containers—they’re raw materials with shape, color, and character waiting to be transformed. From chic home decor to practical storage and outdoor accents, here are creative, safe, and sustainable ways to give your bottles a second life.

Tools, Preparation, and Safety

A little prep makes projects smoother and safer.

Gather Your Basics

  • Glass-safe cleaner, warm soapy water, bottle brush
  • Adhesives: clear epoxy, silicone adhesive (waterproof), cyanoacrylate (super glue) for small embellishments
  • Rope, jute twine, macramé cord, leather lace, corks or pumps
  • Paints: glass spray paint, chalk paint, enamel paint, paint pens
  • Decor: labels, decals, dried flowers, sand, pebbles, fairy lights
  • Optional: glass cutter, sandpaper (80–600+ grits), masking tape, cutting jig
  • Protective gear: safety glasses, cut-resistant gloves, dust mask if sanding

Preparation Tips

  • Label removal: Soak bottles in warm water with a splash of baking soda and dish soap. Use a plastic scraper. For adhesive residue, rub with cooking oil or citrus-based remover, then wash thoroughly.
  • Deodorize: Fill with warm water and a spoon of vinegar; let sit 30 minutes.
  • Dry completely: Moisture trapped inside can cause odors later.

Safety Essentials

  • Wear eye protection and gloves, especially when cutting or sanding glass.
  • Score glass gently and evenly; do not force breaks. Smooth edges thoroughly with wet/dry sandpaper.
  • Use adhesives and paints in well-ventilated areas; follow product instructions.
  • For any project involving heat or electricity, keep flammables away and avoid damp environments. If you’re unsure about wiring, consult a qualified professional.

Fast Projects (No Cutting Required)

These ideas transform bottles with minimal tools and time.

1) Simple Stem Vase Trio

Cluster 3–5 bottles of varying heights for an instant centerpiece.

  • Materials: Clean bottles, twine or ribbon, a few stems of greenery or dried flowers.
  • Steps: Wrap necks with twine, tie a bow, add water and stems. Group on a tray for cohesion.

2) Soap or Lotion Dispenser

  • Materials: Bottle with narrow neck, pump top (28/400 or similar thread size), waterproof label.
  • Steps: Fit pump; if loose, use a silicone gasket or wrap threads with Teflon tape. Label contents.

Tip: Dark amber bottles help protect light-sensitive liquids.

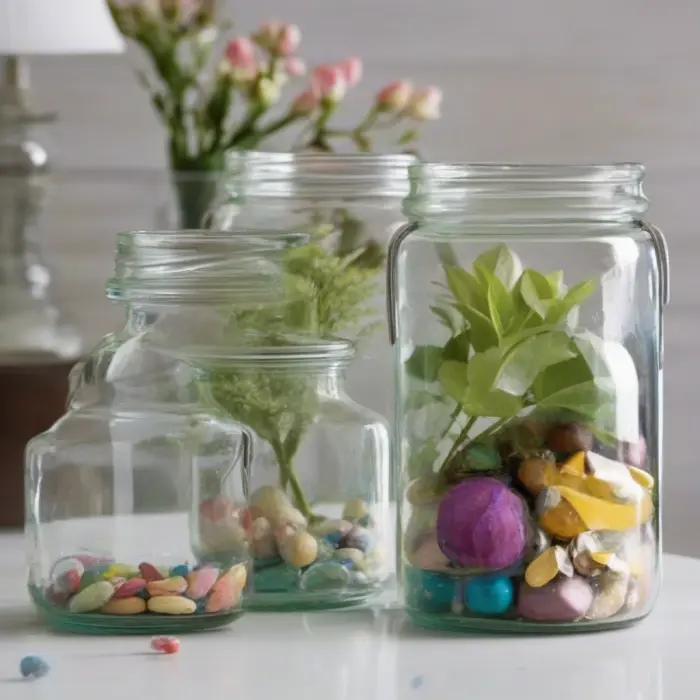
3) Pantry Storage Bottles

Ideal for oils, vinegars, syrups, or homemade coffee concentrates.

  • Materials: Flip-top stoppers or corks, funnel, labels.
  • Steps: Sanitize with boiling water if appropriate for the bottle, fill, label with date.

4) Fairy Light Accent

  • Materials: Battery-powered cork lights or micro-LED string lights.
  • Steps: Feed lights into bottle, position battery housing in the neck. Arrange on shelves for ambient glow.

5) Message-in-a-Bottle Guest Book

  • Materials: Bottle, small scrolls of paper, thin ribbon, tag.
  • Steps: Invite guests to write notes and add to the bottle; open on an anniversary or special day.

6) Spice Sprinklers

  • Materials: Small bottles, shaker lids or pierced corks.
  • Steps: Clean, dry, fill with spices or chili flakes; add a label strip and date.

Cut-and-Craft Projects

Cutting bottles unlocks planters, candle holders, and more. Always smooth edges thoroughly.

How to Cut a Glass Bottle (Overview)

  1. Mark: Use masking tape or a guide to mark a straight line where you want the cut.
  2. Score: Use a handheld glass cutter or a bottle-cutting jig to make a single, even score around the bottle. Do not go over the same line twice.
  3. Separate: Alternate dipping the scored line in hot water then cold water, or rotate over steam then under cold tap. Gentle thermal changes help the break follow the score. Do not force; repeat the cycle until it separates.
  4. Sand: Start with 80–120 grit to remove sharpness, then progress to 220–400+ grit. Use water while sanding to reduce dust. Finish with 600+ for a smooth lip.

7) Candle Tumblers from Wine Bottles

  • Materials: Wine bottles, soy wax, wicks, wick stickers, fragrance oils (optional), pouring pitcher.
  • Steps:
    1. Cut and sand bottles to tumbler height (8–12 cm).
    2. Adhere wick to center; pre-warm glass slightly to reduce frosting.
    3. Melt wax per manufacturer instructions; add fragrance and pour.
    4. Allow to cure, trim wick to 5–6 mm.

Safety: Burn on a heat-safe surface; never leave unattended.

8) Self-Watering Planter

  • Materials: 1 bottle, cotton cord, potting mix, plant (herbs or pothos), pebbles.
  • Steps:
    1. Cut bottle around the shoulder; invert top into bottom.
    2. Thread cotton wick through the neck; fill base with water.
    3. Add pebbles for drainage, potting mix, and plant. Keep wick moist.

9) Hanging Herb Garden

  • Materials: Long bottles, macramé hangers, potting soil, herbs.
  • Steps: Cut an oval window on the side or use uncut bottles with top removed; plant herbs; hang near bright, indirect light.

Tip: Add a thin layer of activated charcoal to reduce odors.

10) Bathroom Organizer

  • Materials: Short bottles, wooden board, metal hose clamps, screws, anchors.
  • Steps:
    1. Sand bottle rims; mount clamps to board.
    2. Slip bottles into clamps; tighten to hold.
    3. Use for cotton swabs, toothbrushes, or makeup brushes.

11) Tea Light Lanterns

  • Materials: Bottles, metal wire, pliers, tea lights or LED tea lights.
  • Steps: Cut base or keep whole; create a wire handle around the bottle’s groove; place tea light inside. Prefer LED for safety.

Lighting Ideas

Glass diffuses light beautifully. Use low-heat LED options for safety.

12) Pendant Bottle Lamps

  • Materials: Bottles, pendant light kit rated for the application, LED bulbs, grommet/rubber bushing.
  • Concept:
    1. Cut bottle base, smooth edges.
    2. Thread pendant cord through the neck with a grommet to avoid abrasion.
    3. Install low-heat LED bulb, ensuring adequate ventilation.

Safety: If you are unfamiliar with electrical work, use a premade UL-listed pendant kit and follow all instructions.

13) Wall Sconce with Backboard

  • Materials: Rustic board, leather strap or clamp, bottle with micro-LEDs.
  • Steps: Mount strap to board, secure bottle, add battery lights. Hide switch behind the board for a clean look.

14) Colored Mood Lights

  • Materials: Blue/green bottles, smart LED cork lights.
  • Steps: Insert lights; set color scenes for evening ambiance.

Garden and Outdoor Projects

15) Bottle Border or Edging

  • Materials: Assorted bottles, sand/gravel, mallet, digging tool.
  • Steps:
    1. Dig a trench around beds.
    2. Set bottles upside-down in the trench with necks buried for stability.
    3. Backfill with sand/gravel to cushion and secure.

Tip: Alternate colors for a mosaic effect that glows in sunlight.

16) Bird Feeder

  • Materials: Bottle, feeder base (store-bought), wire or chain, seeds.
  • Steps: Attach base to bottle neck per product instructions, fill with seed, hang in a shaded spot. Clean regularly to prevent mold.

17) Wind Chimes

  • Materials: Bottle (cut base), metal or ceramic clapper, fishing line or chain, ring.
  • Steps: Smooth cut edge thoroughly. Suspend clapper inside bottle just below the lip. Hang from a sturdy hook.

18) Tiki Torch-Style Patio Lights

  • Materials: Bottle, torch wick, torch fuel made for outdoor use, copper coupling, Teflon tape.
  • Steps:
    1. Wrap coupling with Teflon tape for a snug fit in bottle mouth.
    2. Insert wick, fill bottle with fuel per instructions, secure coupling.
    3. Mount to a fence post using clamps or place in a stable holder.

Safety: Use only outdoors, away from flammable materials. Cap and store fuel safely.

Finishes and Decorative Techniques

Surface Prep

  • Degrease: Wipe with isopropyl alcohol before painting or gluing.
  • Keying: Lightly scuff with 400–600 grit sandpaper to help paint adhere.

Painting and Coating

  • Frosted Finish: Use frosted glass spray for a soft, diffused look.
  • Chalk Paint: Gives a matte, vintage feel. Seal with a clear topcoat for durability.
  • Enamel or Multi-Surface Acrylic: Bake-curable options can improve chip resistance (follow product baking instructions).
  • Hydro-Dipping: Swirl spray paint on water and dip bottle for marbled patterns.

Etching and Stenciling

  • Etching Cream: Apply with a stencil for monograms or patterns. Rinse thoroughly per product directions.
  • Glass Markers: Draw freehand designs; seal with clear finish if needed.

Adhesive Decor

  • Decoupage: Apply tissue paper, maps, or music sheets using decoupage medium. Smooth bubbles with a brayer.
  • Metal Leaf: Apply adhesive size, lay gold/silver leaf, burnish gently; seal with varnish.
  • Embossed Labels: Use label makers or embossed foil tapes for a boutique look.

Textile and Natural Wraps

  • Macramé Nets: Create hanging sleeves with square knots and gathering knots.
  • Rope or Jute Wrap: Spiral wrap with hot glue or epoxy for nautical style; combine with shells or driftwood.
  • Leather Sleeves: Cut to size, punch holes, and lace up for a sleek grip.

Finishing Edges

  • Wet Sand: Progressively finer grits until smooth and safe to touch.
  • Polish: Use cerium oxide with a felt wheel for a glossy rim (optional).

Styling, Gifting, and Selling Tips

Design Cohesion

  • Color Stories: Group by glass color (amber, cobalt, emerald) for curated displays.
  • Repetition: Repeat one design element—same twine, same stencil—to unify mixed bottles.

Personalization

  • Monograms and Dates: Great for weddings, anniversaries, housewarmings.
  • Recipe Bottles: Gift infused oils or simple syrups with printed recipe tags.

Eco and Practical Notes

  • Food Safety: If refilling with consumables, ensure bottles are thoroughly sanitized and closures are food-safe.
  • Durability: Use waterproof labels and sealants for kitchen or outdoor use.
  • Selling: Include care instructions, materials used, and safety notes; use high-quality photos with size references.

Troubleshooting and FAQs

Why did my bottle crack off the score line?

  • Uneven score or excessive pressure can cause wandering cracks.
  • Solution: Use a jig for consistent scoring; apply gentle, even pressure; use slower, controlled temperature changes.

Paint is peeling—what went wrong?

  • Likely poor surface prep or incompatible paint.
  • Solution: Degrease with alcohol, lightly scuff, use glass-compatible paint, and allow proper cure time.

LED lights look dim inside darker bottles. Any fix?

  • Use brighter or warm-white LEDs, or place reflective foil at the back of the bottle to bounce light forward.

How do I remove strong bottle odors?

  • Soak with baking soda and warm water; rinse with vinegar; let air-dry in sunlight.

Is all glass suitable for cutting?

  • Most standard bottles are fine. Very thick or tempered glass (rare in bottles) is difficult and unsafe to cut.

Project Inspiration Gallery (Placeholders)

Frosted glass bottle vases with eucalyptus stems
Minimalist frosted vases tied with linen ribbon.
Hanging macramé bottle planters by a window
Sunlit herb garden in macramé nets.
Assorted bottle candles with etched patterns
Etched tumblers poured with soy candles.

Final Thoughts

Upcycling glass bottles blends sustainability with style. Start simple, refine your techniques, and let the shapes and colors guide your designs. With safe practices and a touch of imagination, everyday bottles become lasting, personal pieces for your home and garden.

Most Read

Best games for PS5 ever

Innovative Ways to Boost Your Creativity

DIY Fitness Equipment for Home Workouts

Creative Ways to Upcycle Old Jeans into Home Decor