


Why Build Your Own Outdoor Furniture?
- Customize comfort: tweak seat angles, heights, and cushion firmness to your liking.
- Save money: quality wood and hardware often cost less than pre-made sets.
- Durability: choose weather-resistant materials and finishes to outlast store-bought pieces.
- Satisfaction: enjoy pieces you crafted with your own hands.
- Sustainability: repurpose reclaimed timber or pallets and use eco-friendly finishes.
Plan Your Relaxation Zone
Before you cut a single board, define how you want to relax outdoors—lounging with a book, hosting friends, napping, or sunbathing—and plan furniture accordingly.
Measure and Map
- Measure the footprint of your patio, deck, or yard area.
- Sketch a simple layout with walking paths (minimum 24 in / 61 cm) and groupings for conversation.
- Observe sun, shade, wind, and privacy at different times of day.
- Note surfaces (grass, pavers, decking) for leg stability and drainage.
Choose a Style and Palette
- Modern: clean lines, slats, neutral finishes.
- Classic: curves, Adirondack silhouettes, natural wood tones.
- Coastal: white or driftwood stains, striped fabrics, rope accents.
- Rustic: reclaimed boards, visible grain, matte oil finishes.
Materials and Hardware
Wood Options
- Cedar or Redwood: naturally rot-resistant, light, easy to work.
- Pressure-Treated Pine: budget-friendly and durable; let dry before finishing.
- Teak, Ipe, Acacia: dense, highly durable; pre-drill and use sharp tools.
- Reclaimed Timber or Pallets: eco-friendly; inspect for stamps (HT heat-treated only) and remove nails.
Fasteners and Adhesives
- Exterior-grade screws: stainless steel or coated deck screws resist rust.
- Bolts: galvanized or stainless carriage bolts for structural joints.
- Adhesives: waterproof wood glue (ANSI Type II or III) for added strength.
- Brackets: concealed or decorative exterior brackets for easy assembly.
Finishes
- Penetrating oil (teak oil, tung blends): easy maintenance, natural look.
- Spar urethane or marine varnish: high protection; recoat periodically.
- Exterior paint or solid-color stain: UV protection and color control.
- Clear water-repellent sealers: for woods you want to gray naturally.
Fabrics and Foam
- Outdoor fabrics: solution-dyed acrylic or polyester (e.g., UV/fade/mildew resistant).
- Foam: quick-dry (reticulated) foam with mesh underlayment for drainage.
- Webbing or slings: polypropylene or polyester for support under cushions.
Comfort and Ergonomics
- Seat height: 13–18 in (33–46 cm) depending on lounge vs dining; lower for lounging.
- Seat depth: 18–22 in (46–56 cm); add cushions to adjust.
- Backrest angle: 100–110° for relaxed seating; 95–100° for dining.
- Armrest height: 8–10 in (20–25 cm) above seat; comfortable width is 3–5 in (7.5–12.5 cm).
- Curved slats or lumbar support: increases comfort for long sits.
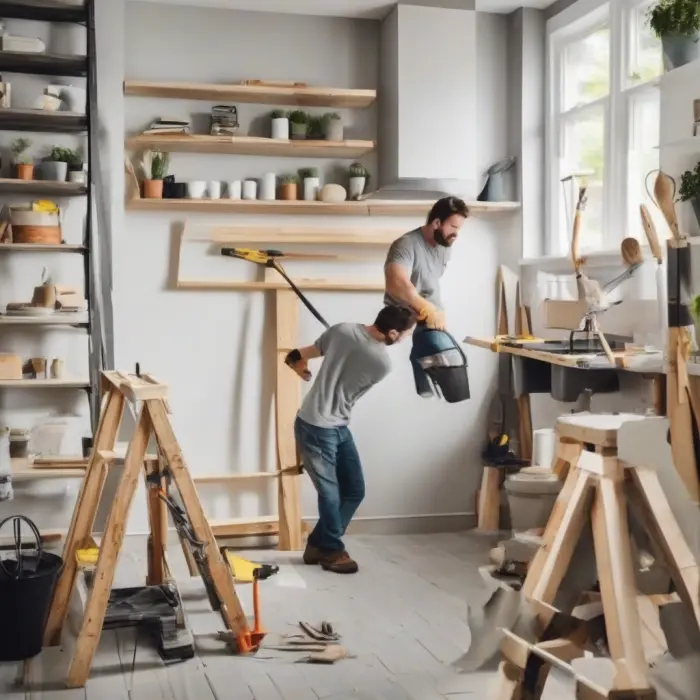
Essential Tools
- Saw: circular saw, miter saw, or handsaw for straight cuts.
- Drill/driver and bits: pre-drill to avoid splitting; use countersink bits.
- Sander: random orbital with 80/120/180 grit for smooth edges.
- Measuring tools: tape, square, straightedge, angle finder.
- Clamps: hold pieces during glue-up and assembly.
- Optional: pocket-hole jig, router for roundovers, jigsaw for curves.
Safety: Wear eye and hearing protection, a dust mask when sanding, and follow tool manuals. Work on stable surfaces and keep hands clear of blades.
Project 1: Classic Adirondack Chair
The Adirondack is a relaxation icon—wide arms, deep seat, and a gentle recline perfect for sunsets and bonfires.
Approximate Dimensions
- Overall width: 30–32 in (76–81 cm)
- Seat height (front): 13–15 in (33–38 cm)
- Seat depth: 18–20 in (46–51 cm)
- Back angle: 100–105°
Materials
- 1x6 cedar or pine: about 6–8 boards at 8 ft (244 cm)
- 1x4 boards: 4–6 boards at 8 ft
- 2x4 for legs and supports: 2–3 boards at 8 ft
- Exterior screws: 1-1/4 in (32 mm) and 2-1/2 in (64 mm), stainless or coated
- Waterproof wood glue (optional)
- Finish: exterior oil, varnish, or paint
Cut List (Typical)
- Legs: 2 pcs 2x4 at 31 in (79 cm), rear angle cut
- Front stretcher: 1 pc 2x4 at 22 in (56 cm)
- Seat slats: 7–9 pcs 1x4 at 22 in (56 cm), front slat with rounded front edge
- Back slats: 5–7 pcs 1x6 at 32–36 in (81–91 cm), top edges rounded
- Seat supports: 2 pcs 1x6 at 33 in (84 cm), tapered for slope
- Armrests: 2 pcs 1x6 at 28–30 in (71–76 cm), front corners rounded
- Arm supports: 2 pcs 1x4 at 24 in (61 cm)
- Back support crosspieces: 2 pcs 1x4 at 20–22 in (51–56 cm)
Steps
- Layout and cut the leg angles and seat supports. Dry-fit to visualize the recline.
- Assemble the base: connect legs with the front stretcher and add seat supports using 2-1/2 in screws. Ensure square alignment.
- Install seat slats from front to back, spacing 1/4 in (6 mm). Round the front slat for comfort.
- Create the backrest: screw back slats to two horizontal 1x4 crosspieces, leaving 1/4 in gaps. Curve or arch the top if desired.
- Attach the backrest to the base at the desired angle (typically 100–105°). Reinforce with bolts or long screws through the legs.
- Add arm supports to legs, then attach the wide armrests. Ensure they are level and comfortable.
- Sand all edges smooth and round over arm and seat edges for comfort.
- Finish with oil, varnish, or paint. Allow proper curing time before use.
Tip: If you plan to stack or store seasonally, use bolts with washers and locknuts on the backrest so it can be removed easily.
Project 2: Modular Pallet Sofa with Deep Cushions
Transform heat-treated pallets into a low, lounge-worthy sectional. It’s quick, budget-friendly, and adaptable to any patio size.
Materials
- 4–8 heat-treated pallets (look for HT stamp; avoid MB/methyl bromide)
- Deck screws, 2-1/2 in (64 mm)
- Sandpaper 80/120 grit, or a sander
- Landscape fabric or slats for under-cushion support
- Optional: locking casters, corner brackets
- Outdoor cushions or DIY covers with quick-dry foam
Steps
- Inspect and prep pallets: remove any protruding nails or staples. Sand surfaces and edges smooth.
- Build bases: stack pallets two high for seat height around 14–16 in (36–41 cm). Screw stacks together at corners.
- Create backrests: stand pallets vertically behind bases or build back frames from 2x4s at a 100–105° angle. Secure with brackets.
- Add support: staple landscape fabric or install additional slats to prevent cushion sagging.
- Configure modules: line up bases into an L or U shape. Connect with screws or leave modular for flexibility.
- Finish: apply exterior oil or paint. Let dry fully.
- Add cushions: use 24x24 in (61x61 cm) seat cushions or DIY covers sized to each module. Throw pillows elevate comfort.
Optional upgrade: Add a low platform front edge with 1x6 boards to create a clean, finished facade and keep cushions aligned.
Project 3: Adjustable Chaise Lounge
Perfect for sunbathing or reading, this chaise features a slatted deck with an adjustable back.
Approximate Dimensions
- Length: 76–80 in (193–203 cm)
- Width: 26–30 in (66–76 cm)
- Seat height: 12–16 in (30–41 cm)
Materials
- 2x4 for frame rails and legs
- 1x4 slats for deck (about 16–20 pieces)
- Hinges (stainless), 2–3 pcs
- Adjustable support bar with notches (build from 1x3) or use a pre-made ratcheting bracket
- Exterior screws, wood glue
Steps
- Build the deck frame: two 2x4 rails at 76 in with crosspieces every 16 in. Check for square.
- Add legs: 2x4 blocks at each corner to achieve your target seat height.
- Install slats: space 1/4 in apart, attach with 1-1/4 in screws. Leave the back section slats unattached for the adjustable panel.
- Create the back panel: frame a 24–28 in long section with 2x2s and attach slats. Hinge it to the deck at the pivot point.
- Attach the notched support bar under one side; test multiple positions for reading and flat lounging.
- Round over edges and sand smooth. Finish with oil or spar urethane.
- Add a custom pad: 2–3 in (5–7.5 cm) quick-dry foam wrapped in outdoor fabric with ties.
Tip: Add discrete wheels to the head end for easy repositioning in sun or shade.
Quick-Build Ideas
- Side Table with Shelf: 2x2 legs, 1x4 top slats, 1x3 lower shelf. Great between chairs.
- Planter Bench: two planter boxes joined by a 48–60 in (122–152 cm) bench seat.
- Hammock Stand (A-Frame): two A-frames with a top beam; anchor with carriage bolts and ground stakes.
- Outdoor Coffee Table with Ice Bin: center panel removable for a drop-in cooler tray.
Joinery Basics for Outdoors
- Pocket screws: fast and strong; use exterior-rated screws and plugs.
- Half-lap joints: great for frames and arms; lots of glue surface and mechanical strength.
- Through-bolts: use where loads are high (backs, legs, hammocks).
- Pre-drill and countersink: prevents splits and lets screw heads sit flush.
Finishing, Weatherproofing, and Maintenance
Prep
- Sand to 120–150 grit; break sharp edges for comfort.
- Remove dust thoroughly before finishing.
Apply Finish
- Oil: flood the surface, let it soak, wipe off excess. Reapply every season or as needed.
- Varnish/urethane: thin coats, light sand between, follow cure times.
- Paint: prime bare wood, use exterior topcoat with UV inhibitors.
Seasonal Care
- Clean with mild soap and water; avoid pressure washing soft woods.
- Inspect joints and refasten or recoat finish annually.
- Store cushions indoors when wet weather is expected.
- Use covers or elevate feet to reduce wicking and rot.
Comfort Upgrades
- Integrated cup holders or trays at armrests.
- Wide armrests that double as laptop/book rests.
- Umbrella mount or simple pergola frame for shade.
- Lumbar pillows and headrests with Velcro or tie-downs.
- Removable, washable cushion covers with zippers.
- Under-seat storage for throws and games.
Budget, Time, and Sustainability
- Budget ranges: Adirondack ($60–$180 in wood/fasteners), pallet sofa ($40–$150 plus cushions), chaise ($90–$220).
- Time estimates: simple side table (2–3 hours), Adirondack (6–10 hours), chaise (6–8 hours), pallet sofa (3–5 hours).
- Source FSC-certified lumber or reclaimed materials where possible.
- Choose low-VOC finishes and reuse offcuts for coasters, planters, or brackets.
Troubleshooting and Pro Tips
- Wobble: check for square assemblies; add diagonal braces or level feet.
- Splitting: pre-drill near ends and avoid driving screws too close to edges.
- Pooling water: round or bevel top slats; leave consistent gaps for drainage.
- Fastener corrosion: use stainless near pools/coast; avoid mixing metals.
- Comfort tweaks: adjust back angle a few degrees or add thicker cushions.
- Templates: create cardboard or hardboard templates for repeated curves and angles.
Simple Weekend Plan
- Friday evening: purchase materials and cut to length.
- Saturday morning: assemble frames and dry-fit; Saturday afternoon: sand and first coat of finish.
- Sunday: final assembly, touch-ups, and styling with cushions and plants.
Relax and Enjoy
Your backyard lounge furniture should invite you to slow down. With a thoughtful plan, durable materials, and a few well-chosen tools, you can create pieces that look great, feel even better, and last for many seasons.
Start with one piece—an Adirondack or side table—and build your oasis over time. Each project improves your skills and adds another place to unwind.