Flowers have a way of changing a room’s mood—calming corners, brightening workspaces, and making ordinary meals feel like celebrations. Whether you’re prepping for a special occasion or simply elevating everyday life, arranging your own flowers is a creative ritual that brings nature inside and invites you to slow down, notice color and texture, and play with form.
Why Arrange Your Own Flowers?
Personal expression: Curate colors, shapes, and scents to reflect your style and season.
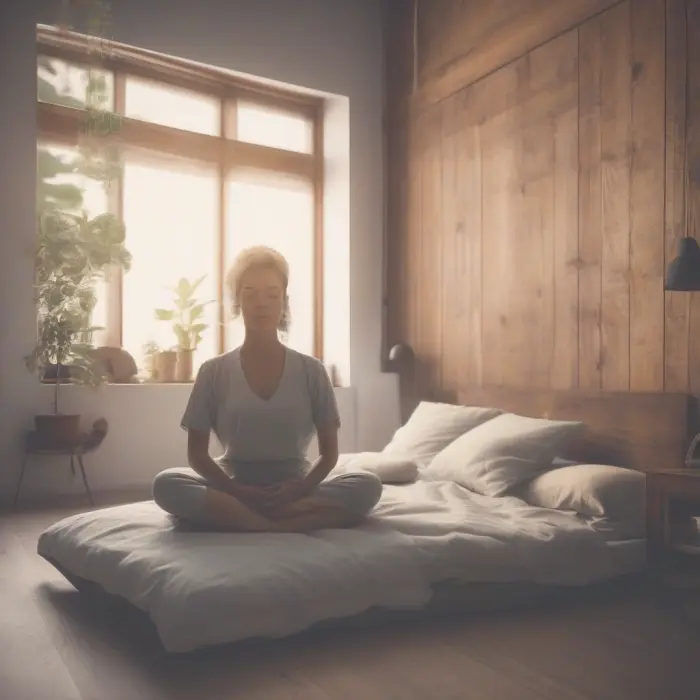
Mindful practice: The tactile process of trimming, placing, and editing is calming and focused.
Budget-friendly beauty: A few market stems or garden clippings can become a centerpiece.
Sustainable choices: Select local, seasonal, and foam-free methods to reduce waste.
Essential Tools and Materials
Sharp floral shears or pruners (clean and rust-free)
Floral tape or waterproof clear tape (for gridding vase openings)
Chicken wire or a reusable pin frog (eco-friendly mechanics)
Twine or floral wire (for hand-tied bouquets)
Clean vases, bowls, or jars (varied heights and openings)
Bucket with lukewarm water (for conditioning flowers)
Flower food packets or a DIY solution (see below)
Optional: Gloves for thorny stems, a clean work surface, a small knife for precision cuts
Choosing Flowers and Foliage
Think in Roles: Line, Focal, and Filler
Line/structural stems: Branches, delphinium, snapdragons—these create height and shape.
Focal blooms: Roses, peonies, dahlias, sunflowers—big personalities that draw the eye.
Mass and filler: Spray roses, mums, waxflower, limonium—bridge gaps and add fullness.
Airy texture: Grasses, astilbe, nigella, fern—add movement and lightness.
Foliage: Eucalyptus, ruscus, salal, maple—establish silhouette and volume.
Color Harmony Made Simple
Monochromatic: One color in varied shades (e.g., blush to burgundy) for elegance.
Complementary: Opposites on the color wheel (e.g., purple and yellow) for punch.
Analogous: Neighbors on the wheel (e.g., pink, coral, orange) for a cohesive gradient.
Neutral + pop: Greens and whites with one bold hue (e.g., cobalt delphinium) as a focal note.
Scale, Placement, and Scent
Balance stem size with container: Big heads need stable, wide vessels.
Match the room: Bold colors read well across a room; delicate pastels suit intimate nooks.
Scent strategy: Keep highly perfumed blooms away from dining tables or small offices.
Safety and Allergies
Pet caution: Lilies are extremely toxic to cats; keep toxic plants away from pets and children.
Allergies: Remove pollen-heavy stamens (e.g., lilies) and choose low-pollen varieties when needed.
Sourcing Sustainably
Shop local and seasonal when possible; ask florists or markets about regional growers.
Garden cuts: Snip in the cool morning, choose stems just opening, and avoid over-harvesting any plant.
Foraging ethics: Only gather where it’s legal, take minimally, and avoid protected species.
Packaging: Bring your own bucket or tote to reduce single-use plastics.
Conditioning: Set Your Stems Up for Success
Good conditioning extends vase life and improves hydration—arguably the most important step.
Clean: Wash vases and tools with hot, soapy water to reduce bacteria.
Trim: Cut stems at a 45-degree angle using sharp shears; recut after transport.
Strip: Remove leaves below the waterline to prevent rot and cloudiness.
Hydrate: Place stems in lukewarm water for 1–2 hours before arranging.
Woodies: For roses, lilac, hydrangea—score or split the base slightly to aid uptake.
Latex stems: For poppies, euphorbia—briefly sear ends with flame or dip in boiling water to seal.
Water: Change every 1–2 days; clean the vase and recut stems for longevity.
DIY flower food (per quart/liter of water): 1 tsp sugar, a few drops of bleach, and 1 tsp lemon or lime juice. Stir well. This provides food, fights bacteria, and adjusts pH.
Vases and Mechanics
Choosing Containers
Cylinders: Great for modern, vertical lines and tropicals.
Compotes and bowls: Ideal for airy, garden-style arrangements.
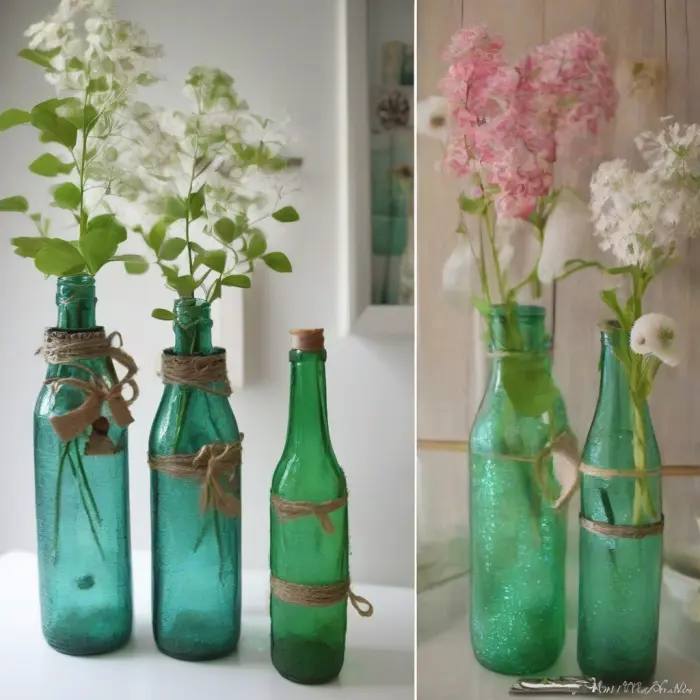
Bottles and bud vases: Showcase single stems; group for impact.
Pitchers and jars: Casual, farmhouse feel—good for kitchen tables.
Stable, Foam-Free Structures
Tape grid: Create a crisscross pattern over the vase opening to guide stems.
Chicken wire: Form a loose ball inside the vase; secure with tape if needed.
Pin frog (kenzan): Heavy metal base with pins for precise stem placement.
Leaf wrap: Coil a large leaf (e.g., aspidistra) inside a clear vase to mask mechanics.
Design Process: Step-by-Step
Set intention: Pick a mood or theme (wild meadow, minimalist, rustic kitchen).
Plan scale: Aim for a total height roughly 1.5–2 times the vase height for classic proportions.
Build the base: Start with foliage to sketch the silhouette—triangle, crescent, or asymmetrical S-curve.
Place focals: Add your largest blooms in odd numbers, slightly off-center for natural rhythm.
Layer support: Tuck medium blooms near focals to bridge color and shape.
Weave in texture: Add airy stems and dancing lines for movement and depth.
Edit: Remove anything crowding focal blooms; create negative space so flowers can breathe.
360-degree check: For centerpieces, rotate and refine all sides; for front-facing, ensure a clear focal front.
Three Project Ideas
1) Airy Spring Compote
Mood: Romantic, garden-inspired. Best on coffee tables or sideboards.
Mechanic: Chicken wire in a shallow compote or bowl
Keep arrangements out of direct sun, away from heaters, and far from ripening fruit (ethylene gas).
Change water every 1–2 days; recut stems each time.
Remove fading blooms promptly to protect the rest.
Top up water daily—thirsty stems can drop below waterline quickly.
Cool nights extend vase life; move displays to a cooler room if possible.
Troubleshooting
Droopy tulips: Prick just below the flower head with a clean pin; stand upright in paper for a few hours.
Roses with bent necks: Recut under water and hydrate in very warm water for 1 hour.
Hydrangea wilt: Submerge heads in cool water for 20–30 minutes; recut stems.
Cloudy water: Clean vase, refresh water, and remove any submerged leaves.
Floppy dahlias: Use pin frogs or tighter grids; keep cool and out of drafts.
Drying and Preserving
Air dry: Hang small bunches of statice, strawflower, yarrow, eucalyptus upside down in a dark, dry spot.
Silica gel: Bury delicate blooms (e.g., roses) for 5–7 days to retain shape and color.
Pressing: Flatten pansies, ferns, and cosmos between parchment under heavy books.
Glycerin for foliage: Soak stems in a glycerin-water mix to keep leaves supple.
Use dried elements in wreaths, shadow boxes, or mixed arrangements for seasonal texture that lasts.
Placement and Proportion
Dining tables: Keep arrangements under 12 inches high or use tall, slender designs above sightlines.
Coffee tables: Wider, lower compotes keep views open and feel inviting.
Entryways: Scale up and simplify to make a strong first impression.
Desks: Compact designs with light fragrance support focus and calm.
Eco and Safety Notes
Avoid floral foam when possible; opt for reusable mechanics like wire and frogs.
Compost trimmings when safe; keep toxic plant waste out of pet-accessible bins.
Use gloves for thorny stems and sap-producing plants; wash hands after handling.
Keep flames away from dried materials and wispy grasses.
Quick Checklist
Clean tools and vases
Condition stems thoroughly
Choose a color story and silhouette
Build with foliage, then focals, then texture
Edit for negative space
Refresh water and recut stems regularly
Bring Nature Inside, Your Way
DIY floral arranging isn’t about perfection—it’s about observation and play. As you work, notice how a single curved tulip can set a mood or how a branch tilts the eye across a room. With a few tools, some simple mechanics, and an eye for seasonal color, you can turn everyday stems into living art that brightens your home and your day.
Optional Image Placeholders
Sketching the silhouette with branches and foliage first.A simple tape grid creates structure for beginner-friendly designs.